How to provision a SAP HANA Cloud Instance
- VIVEK SAHU
- Apr 23, 2021
- 2 min read

Once you have your account structure setup in SAP BTP Cockpit, navigate to Global-account → Sub-account → Space. Afterwards click on SAP HANA Cloud from the menu on the left side of the screen.
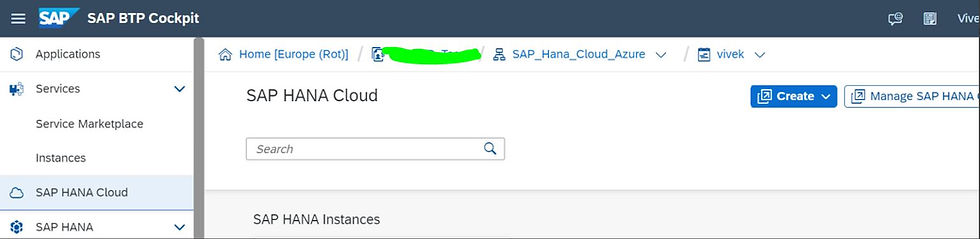
Click on Create → SAP HANA Cloud

A new tab will open in which you will see the SAP HANA Cloud management tool. Follow the steps in the wizard by first inputting a username on the Instance Name field. Please note that you should not use any spaces in the name.
You can insert a description of this instance on the Description field.
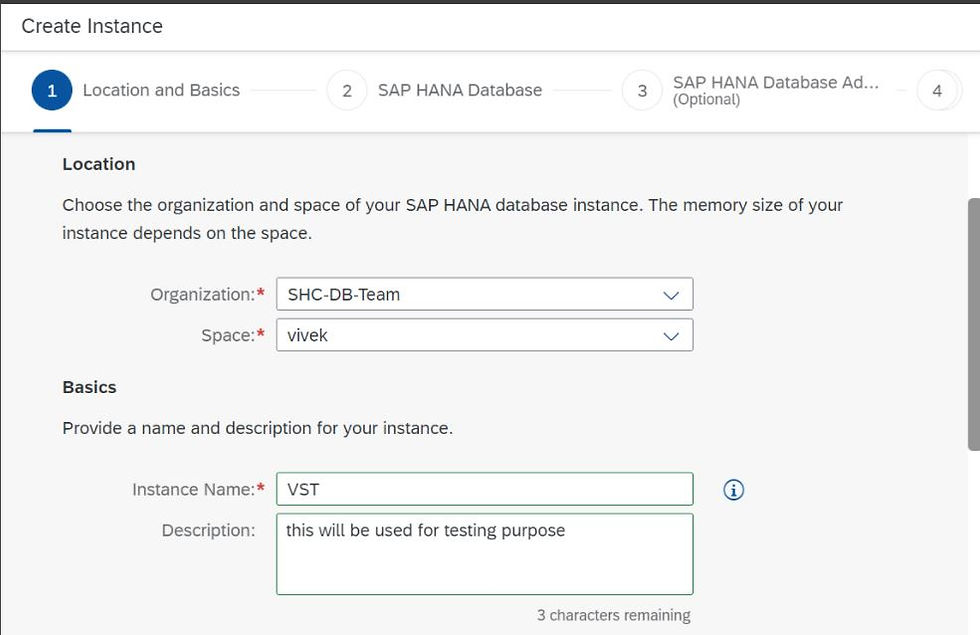
Then insert a password in the Administrator Password field, confirm it by typing it again on the Confirm Administrator Password field.

Now the Step 2 button will appear on the left-hand side of the wizard. Click on it to continue.
Select here how much memory you wish to allocate to this instance. The minimum amount of memory is 30 GB. As you increase your memory requirements, the “compute” and “storage” values will be automatically adjusted as well.

Click on Step 3 to continue.
Now you can manage the allowed connections for your SAP HANA Cloud instance. That means choosing if you allow access to your HANA Cloud instance from outside of the SAP Cloud Platform. You can either limit it to SAP Business Technology Platform by denying all IP addresses or allow specific applications to access it by inserting one or more specific IP addresses. Finally, you can allow all connections from all IP addresses.

Next, you can choose to enable the ScriptServer & Document Store for this database or not. The ScriptServer offers some machine learning capabilities. Please note that the ScriptServer requires the SAP HANA Cloud database to have at least 3 vCPUs. If your database does not have that, you can click on the link on the error message, which will change your original setup and add more vCPUs automatically.

Click on Step 4 in the bottom left corner to continue or on Create Instance on the bottom right side of the screen.
On Step 4, you can choose to enable the SAP HANA Data Lake. Give a name to the data lake instance and adjust how much Compute and Storage space it has. The coordinators and workers will be automatically adjusted as you add more compute and storage. If you do not enable the data lake while creating the instance, you can always do that later.

Click on Step 5. Here you can you can manage the allowed connections for your SAP HANA Data Lake instance

Click on Create Instance and you are done! Your first SAP HANA Cloud instance will be created, and you can monitor its status to see when it will be ready to be used. This process usually takes a few minutes.
Comments